Showing posts with label Baking. Show all posts

Sunday, 18 August 2013

Chocolate Adventures: Part 2

The whole reason I decided to make the chocolate spread, was so I could make Toasted Marshmallow and Nutella Cookies, so that was today's project.


Ingredients


MetricImperial
Chocolate Chip CookiesChocolate Chip Cookies
125g plain flour4½ oz plain flour
70 g butter (softened)2 ½ oz butter (softened)
1 egg1 egg
50 g soft brown sugar (Demerara)2 oz soft brown sugar (Demerara)
50 g superfine / caster sugar2 oz superfine / caster sugar
110 g chocolate chips (see notes)4 oz chocolate chips (see notes)
50 g chopped hazelnuts2 oz chopped hazelnuts
½ teaspoon bicarbonate of soda½ teaspoon bicarbonate of soda
1 teaspoon vanilla extract1 teaspoon vanilla extract

Those are the ingredients for cookies, and then all you'll need to add to that is marshmallows (or "marshrooms" as my sister says) and the chocolate spread of your choice.
Instructions
1. Preheat oven to 375. Line cookie sheets with parchment paper.
2. In a medium mixing bowl, whisk together flour, baking soda, and both sugars.  (I used self-raising flour, so didn't need the baking soda)
3. Cream the butter, and add to the mixture.
4. Crack the egg into a cup, add the vanilla, and beat.  Pour the egg/vanilla mixture into the mixing bowl.
5. Stir the mixture together.  You can use a mixer on a low speed, but it's quite easy without.
6. Fold in the chocolate chips.  I used chocolate buttons, and probably should have chopped them up, but it worked just fine in button form!
7. Take heaping tablespoons of the dough and place them on the greased cookie sheets a few inches apart to allow for spreading. Gently flatten the cookies with your fingers making an indentation in the middle of each one. Place a small dollop of chocolate spread in the center of each cookie, then top with a marshmallow that has been snipped in half with kitchen scissors (or cut with a knife, which is how I did it).
8. Bake the cookies for 8 to 10 minutes. If you are baking more than one tray at a time, switch the top tray with the bottom tray halfway through so that they all bake evenly. They are done when the marshmallows are melted and golden brown and the bottoms of the cookies are slightly darker.
9. The cookies will be a bit soft when fresh out of the oven, use a spatula to carefully transfer them to a wire cooling rack until firm enough to serve.
They will keep in an airtight container at room temp for a week or two. Makes approximately 2 dozen cookies.

Once again, I used "Pure" Dairy-Free Sunflower Spread and Dairy-Free Buttons (brown and white chocolate).  I also used my home-made dairy-free chocolate spread.
I only made 1 tray of marshmallow cookies, as I wasn't sure how they'd turn out.  My other tray was ordinary cookies, just in case!

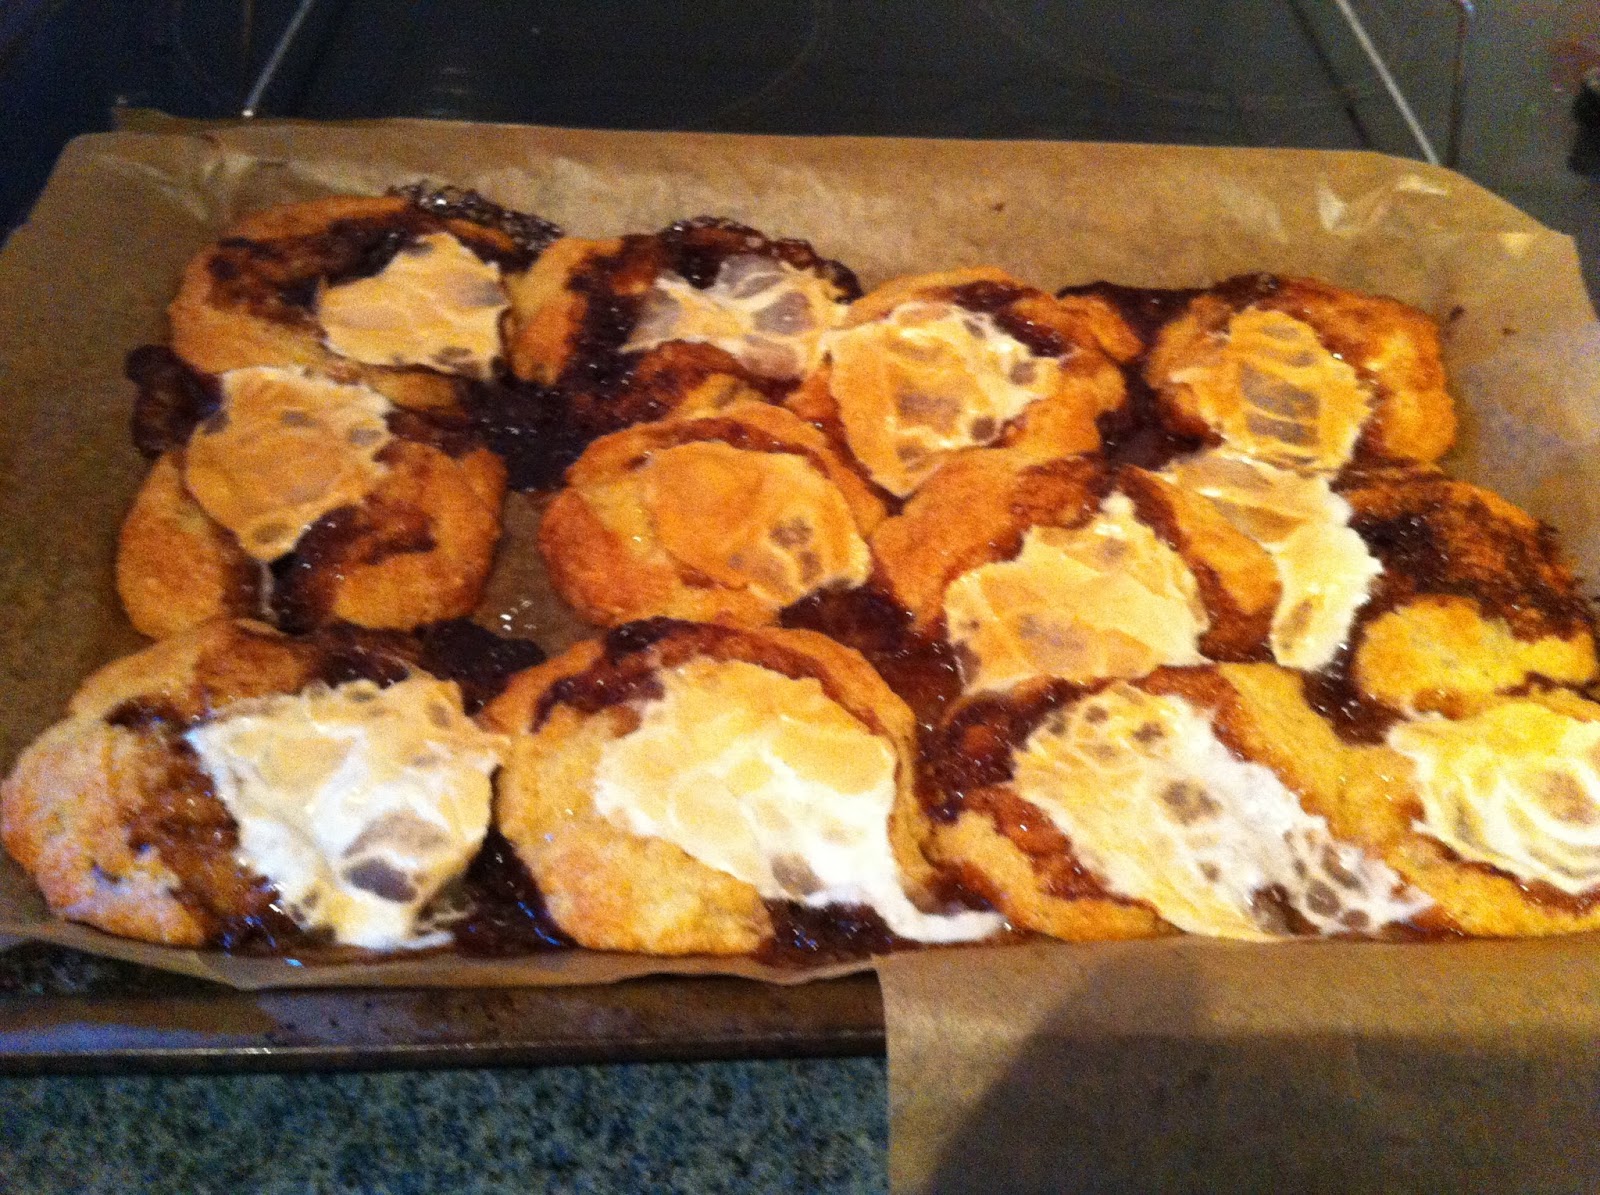
Be warned, photos of the cookies follow.  Go ahead and laugh, I know I did!


The marshmallow cookies certainly won't win any beauty contests, but then again, neither will my normal cookies!


The woman on the blog I got the recipe had much prettier ones.  Not sure what happened, but it's the taste that counts, and they are quite nice.  They're not quite marshmallowy enough for me, so I'll have to try and fix that next time.  I'll update with the verdict from my fussy siblings soon!

All the best,
Charli

Saturday, 17 August 2013

Chocolate Adventures: Part 1


As I have previously mentioned, my little sister is lactose intolerant.  Normally she takes this with good grace (as much as you can expect from a 4 year old who is being told "no"), but today she was feeling pretty down about the entire situation.  All she wanted was a strawberry rice pudding.  Such a simple wish, but one we couldn't grant.  After being told she couldn't have one because it had milk in, she just sighed and said "I wish I wasn't lactose intolereez".  Poor baby.

I wanted to make her something to cheer her up, something she normally wouldn't be allowed.  Yesterday, I'd been on Pinterest and saw a really tasty looking cookie recipe.  It was chocolate chip cookies, with a splodge of Nutella and a toasted marshmallow on top.  Basically, it was a cookie s'more.

Making lactose-free cookies is simple enough, but first I had to solve the challenge of how to make lactose-free chocolate spread.  My sister never liked Nutella, but she always loved nut-free chocolate spread.  Chocolate spread sandwiches were one of her very favourite foods.  It's like torturing a puppy to eat them in front of her now.  If I could pull this off, I'd be able to solve the problem for her.

It took a long time to find a suitable, nut-free recipe, but finally (around page 6 of Google) I found one here - http://lucysfriendlyfoods.wordpress.com/tag/chocolate-spread/

It was a straight-forward recipe (thankfully - I'm not the best at baking).  We even had a spare jam jar in the soon-to-be-collected recycling box.  I rescued it and dishwashed it.

The following recipe makes 1 jar.  As the recipe from the above website is all in cups (American measurement), I've added the equivalent grams and ounces below -

Ingredients

  • Water: 1/4 cup; or 85g; or 3oz
  • Caster Sugar: 1/2 cup; or 100g; or 3.55oz
  • Cocoa Powder: 1tbsp
  • Salt: Pinch
  • Vanilla: 1tsp
  • Dairy-free Chocolate: 2/3 cup; or 90g; or 3.2oz
  • Dairy-free Spread: 2/3 cup; or 152g; or 5.36oz
  1. In a saucepan, melt together the water, sugar, cocoa, and salt. 
  2. Bring the mixture to a simmer, then remove from the heat.
  3. Whisk in the vanilla, chocolate, and margarine/butter until silky and lump free.
  4. Pour into a sterilised jar, and cover with cling film.  Make sure the cling-film touches the top of the chocolate mix, as this prevents a skin forming.
  5. Leave to cool entirely, then remove the cling film.
  6. Keep in the fridge and use within 2 weeks.
In terms of ingredients, I used -
I found it easiest to add all the dry goods (sugar, cocoa, and salt) together first, then pour it all into the water at once.  The mixture came to a simmer very quickly, which came as a surprise, so watch out for that!  I also found it easiest to melt the chocolate, and the butter, before adding it to the mixture in the saucepan.

The only issue I had was that my chocolate sauce was ready before the dishwasher finished cleaning my jam jar!  I filled a pyrex dish with warm water, and put the saucepan into that to keep the mixture from starting to solidify.  It worked really well, but I can't take credit for the suggestion, as it was my Mum's idea.

The chocolate spread (currently chocolate sauce) is now sitting on a high shelf in the utility room, out of the reach of little fingers.  I admit, I tried some of the bit left in the saucepan as I was cleaning up, and it tastes lovely!  I'll post an update when it's finished, as well as my Chocolate Adventure: Part 2 (making the cookies), and give my sister's verdict on the chocolate spread sandwiches.

All the best,
Charli

UPDATE: The chocolate spread sandwiches were announced to be "yummy", and we're almost halfway through the jar already. SUCCESS!

Wednesday, 26 December 2012

When Chocolate Nests Go Wrong...

Father Christmas usually gets a mince pie for his snack at our house, but this year I figured it would be a nice activity with the littlies to make him something together.

While I was out shopping the other day, I came across some cheap Mini Eggs.  These aren't normally available other than at Easter, so I bought myself a bag to eat.  Then I decided to buy another two bags (£1 each!), to make chocolate nests with my siblings.  The perfect, easy thing to make for Father Christmas!  They have now been renamed "Santa Cakes" by my 3 year old sister.

Christmas Eve was pretty hectic, so we made them on Christmas Eve-Eve.

For those of you who don't know, this is how you make chocolate nests -

100g of coco pops (or rice crispies, but I prefer it with coco pops - even more chocolatey!)
200g of chocolate
Paper cases
Mini Eggs to decorate (optional!)

- Break the chocolate into pieces and melt (we used the microwave, on low in short bursts, but the 'proper' method is to boil water in a pan, and put the chocolate in a bowl over the boiling water)
- Mix the coco pops and melted chocolate together
- Put spoonfuls of mix into the paper cases
- Decorate the cakes with Mini Eggs

This made 20 chocolate nests, but the kids were pretty generous with the mix.

Now.  I'm not the most qualified baker in the world.  At one point I had an entire blog dedicated to my adventures (and disasters) in the kitchen.  For example, my cookies are tasty, but usually turn into one big, monster cookie.


I've had the same problem with fairy cakes too.  The small cakes are Jam Buns, which I'll be making in the next couple of days :)


But really, how far wrong can you go with Chocolate Nests...?

That, my friends, is what we call a "Dr Pepper" question.  If you've not seen the "Dr Pepper, what's the worst that can happen?" adverts - go YouTube them!

The problem with the Chocolate Nests was that I was working with two young children.  By the time they had mixed the chocolate and coco pops together, then scooped it into the bun cases...the chocolate had set.  Here's a photo of them, you can sort of see how crumbly they are -


They didn't notice, of course.  They merrily decorated the cakes and I managed to delay the realisation by saying they couldn't have any until the next day (it was bed-time).

Once they were out of ear-shot, I explained the problem to my Dad.  His view was that we'd probably had it, better luck next time.  I tried Facebook, same opinion.  Disaster!  Luckily, Dad mulled it over for a while, and came up with a solution.  Re-melt the chocolate with a hairdryer.  Genius!

We'd heard about chocolatiers using this method, surely it would work here too?  I borrowed my other sister's hairdryer, set it on a high-ish heat but a low-ish 'blow', and got to work.

Thankfully it worked.  I had to be very careful, and hold the hairdryer quite high up though, since it had a tendency to blow the chocolate nests out of the bun tin!  I did remove the Mini Eggs first, by the way.

For good measure I melted some more chocolate (I had a 100g bar left) and drizzled that on top, then replaced all the Mini Eggs.

The next day my brother was eating one, and exclaimed - "We're GOOD at baking, aren't we?  These are so tasty!  At look at the bottom, it looks like a REAL chocolate nests.  We're like professionals!"

I didn't have the heart to tell him :)

Oh, and Father Christmas loved his Santa Cake!